Lesson 4: Ruby on the Web
Introduction
Objectives
In this tutorial we are going to look at:
- what HTTP is and how it works
- using Google Chrome’s Developer tools to inspect HTTP requests
- building a web server with Ruby
- templating HTML
- introducing web security
Goal
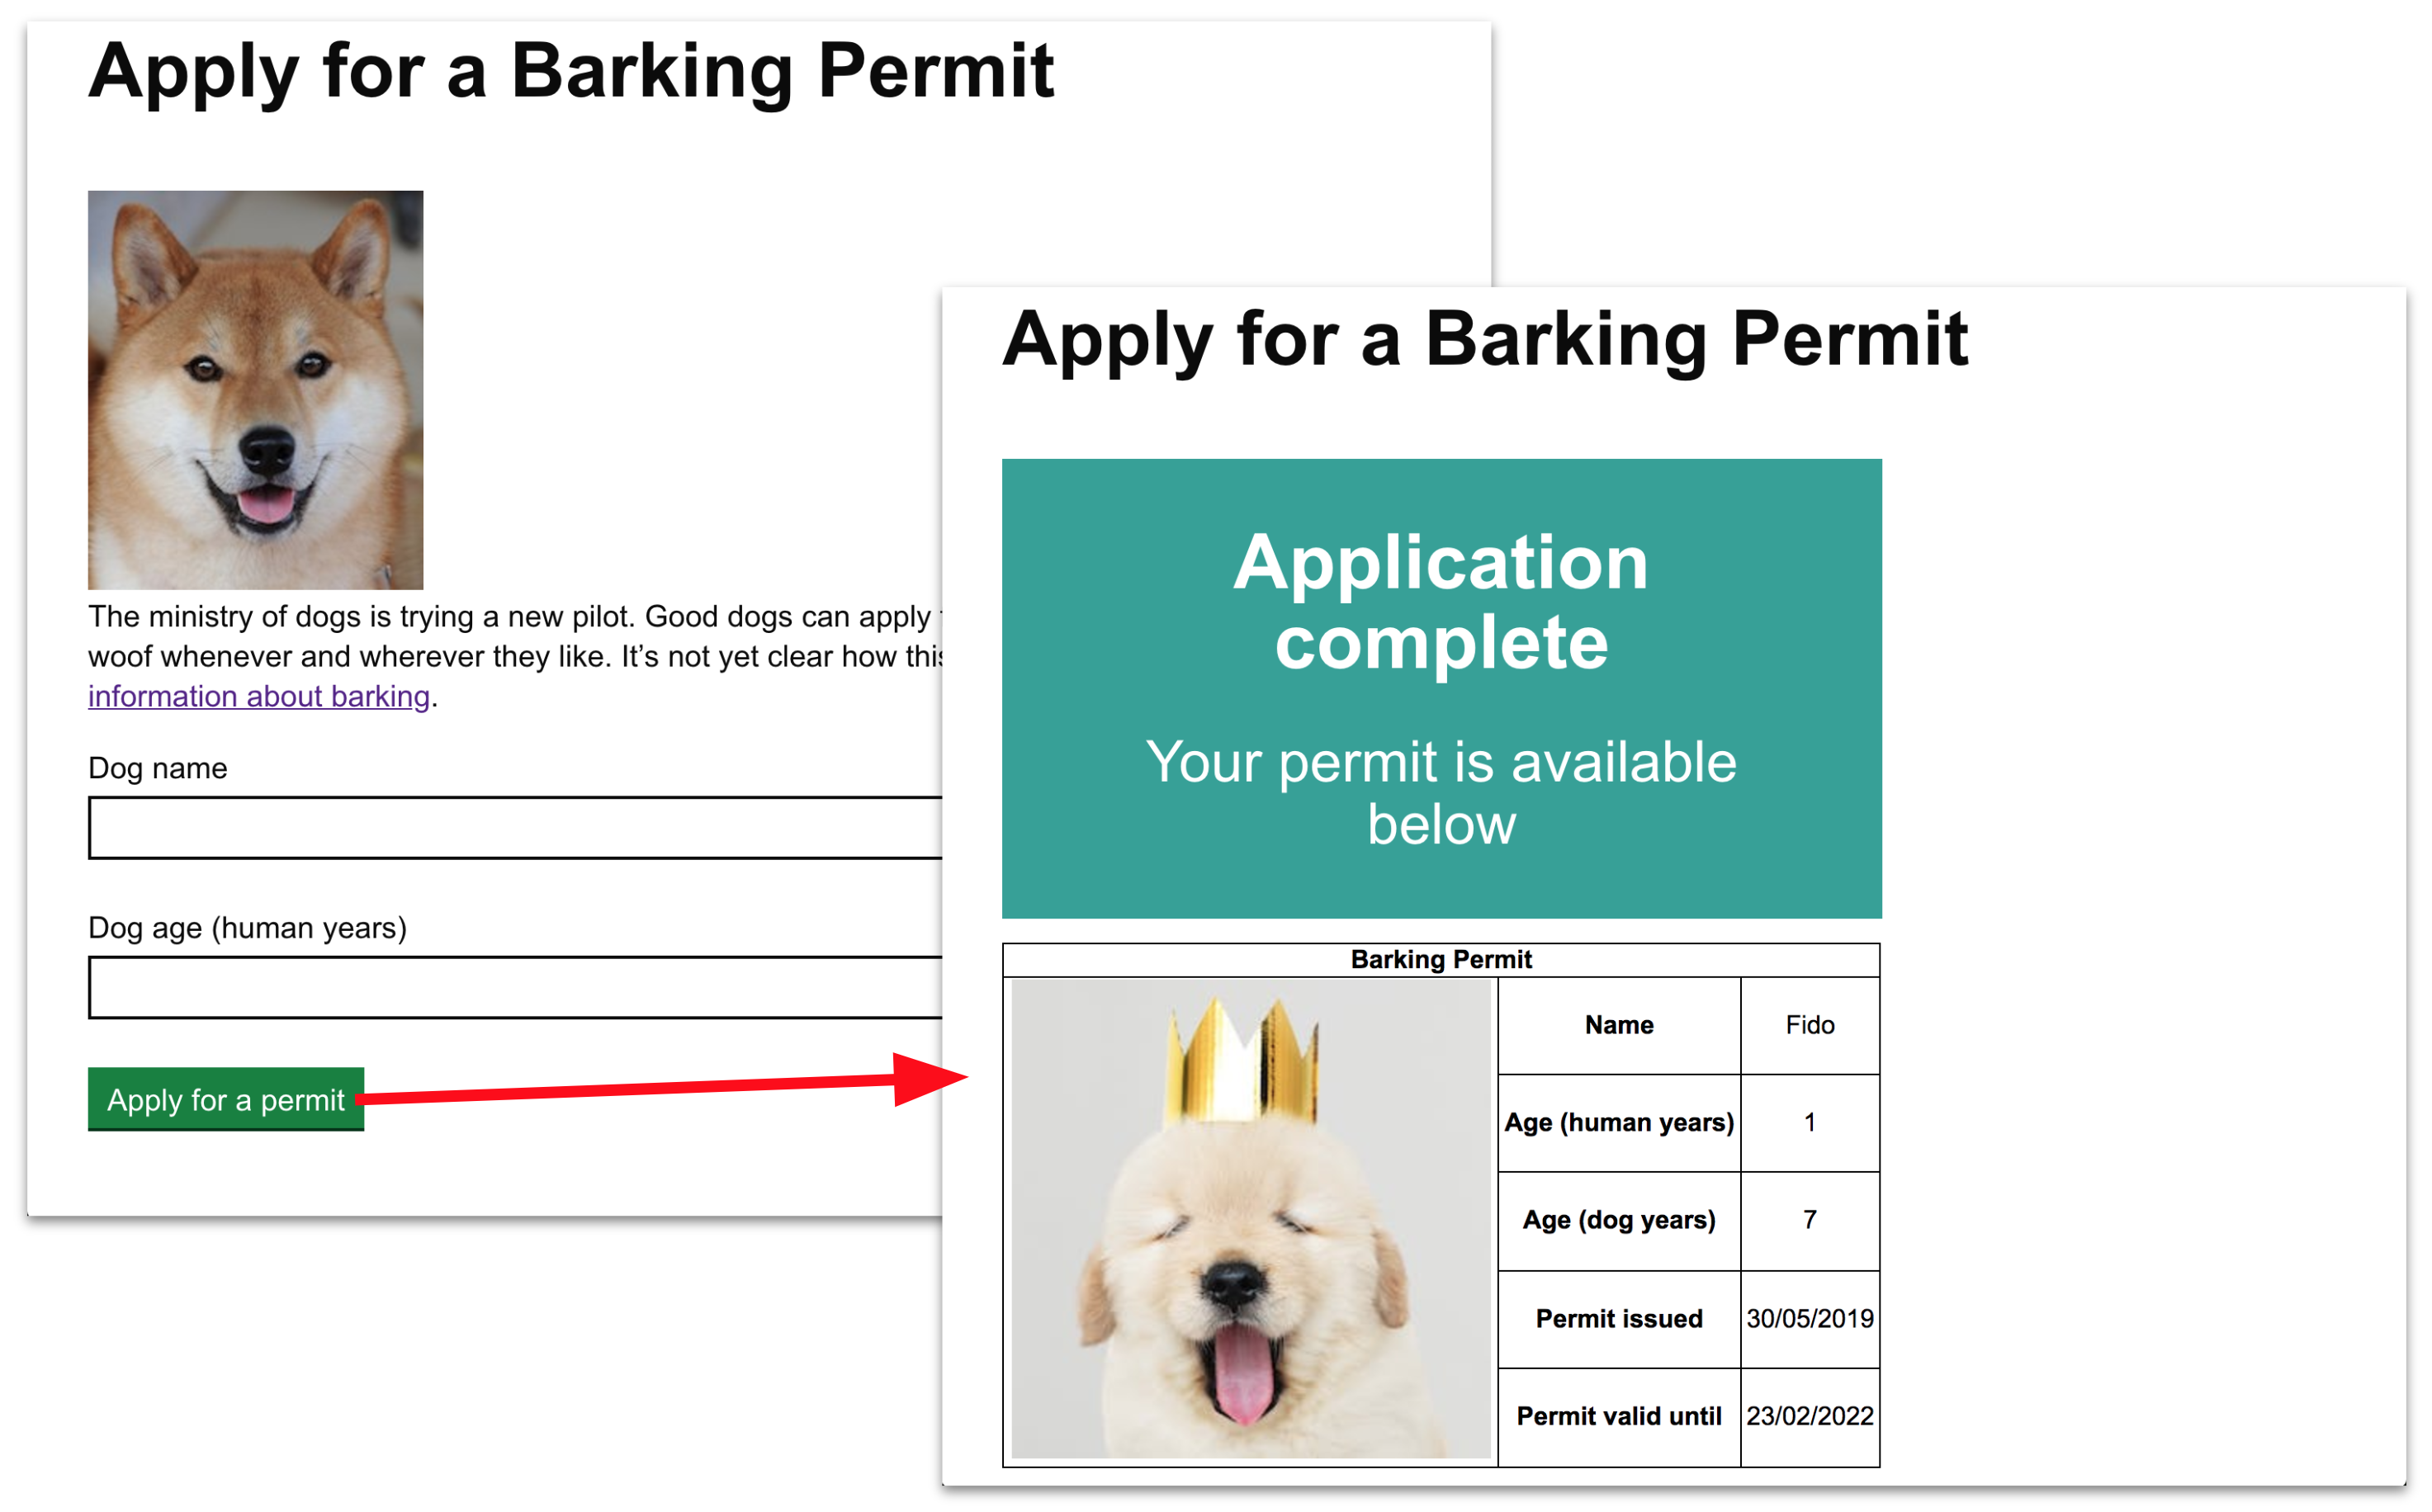
By the end of this tutorial you will have built an “Apply for a barking permit” webpage:

You’ll have a basic understanding of how web applications work, and a good foundation to build on.
Introduction to HTTP
What is HTTP?
HTTP stands for HyperText Transfer Protocol.
HTTP describes the format of the communications between your web browser and a “web server” (which is just a kind of computer).
Your browser sends HTTP requests and the server responds with HTTP responses.
For example, when you visit www.gov.uk your browser will send a request a like this:
GET / HTTP/1.1
Host: www.gov.uk
And GOV.UK’s server will respond with something like:
HTTP/1.1 200 OK
Date: Wed, 29 May 2019 12:08:17 GMT
Content-Type: text/html; charset=UTF-8
Content-Length: 32897

<!doctype html>
<html>
... snip ...
</html>
In this case the response contains the HTML of the GOV.UK homepage.
Viewing HTTP requests using browser developer tools
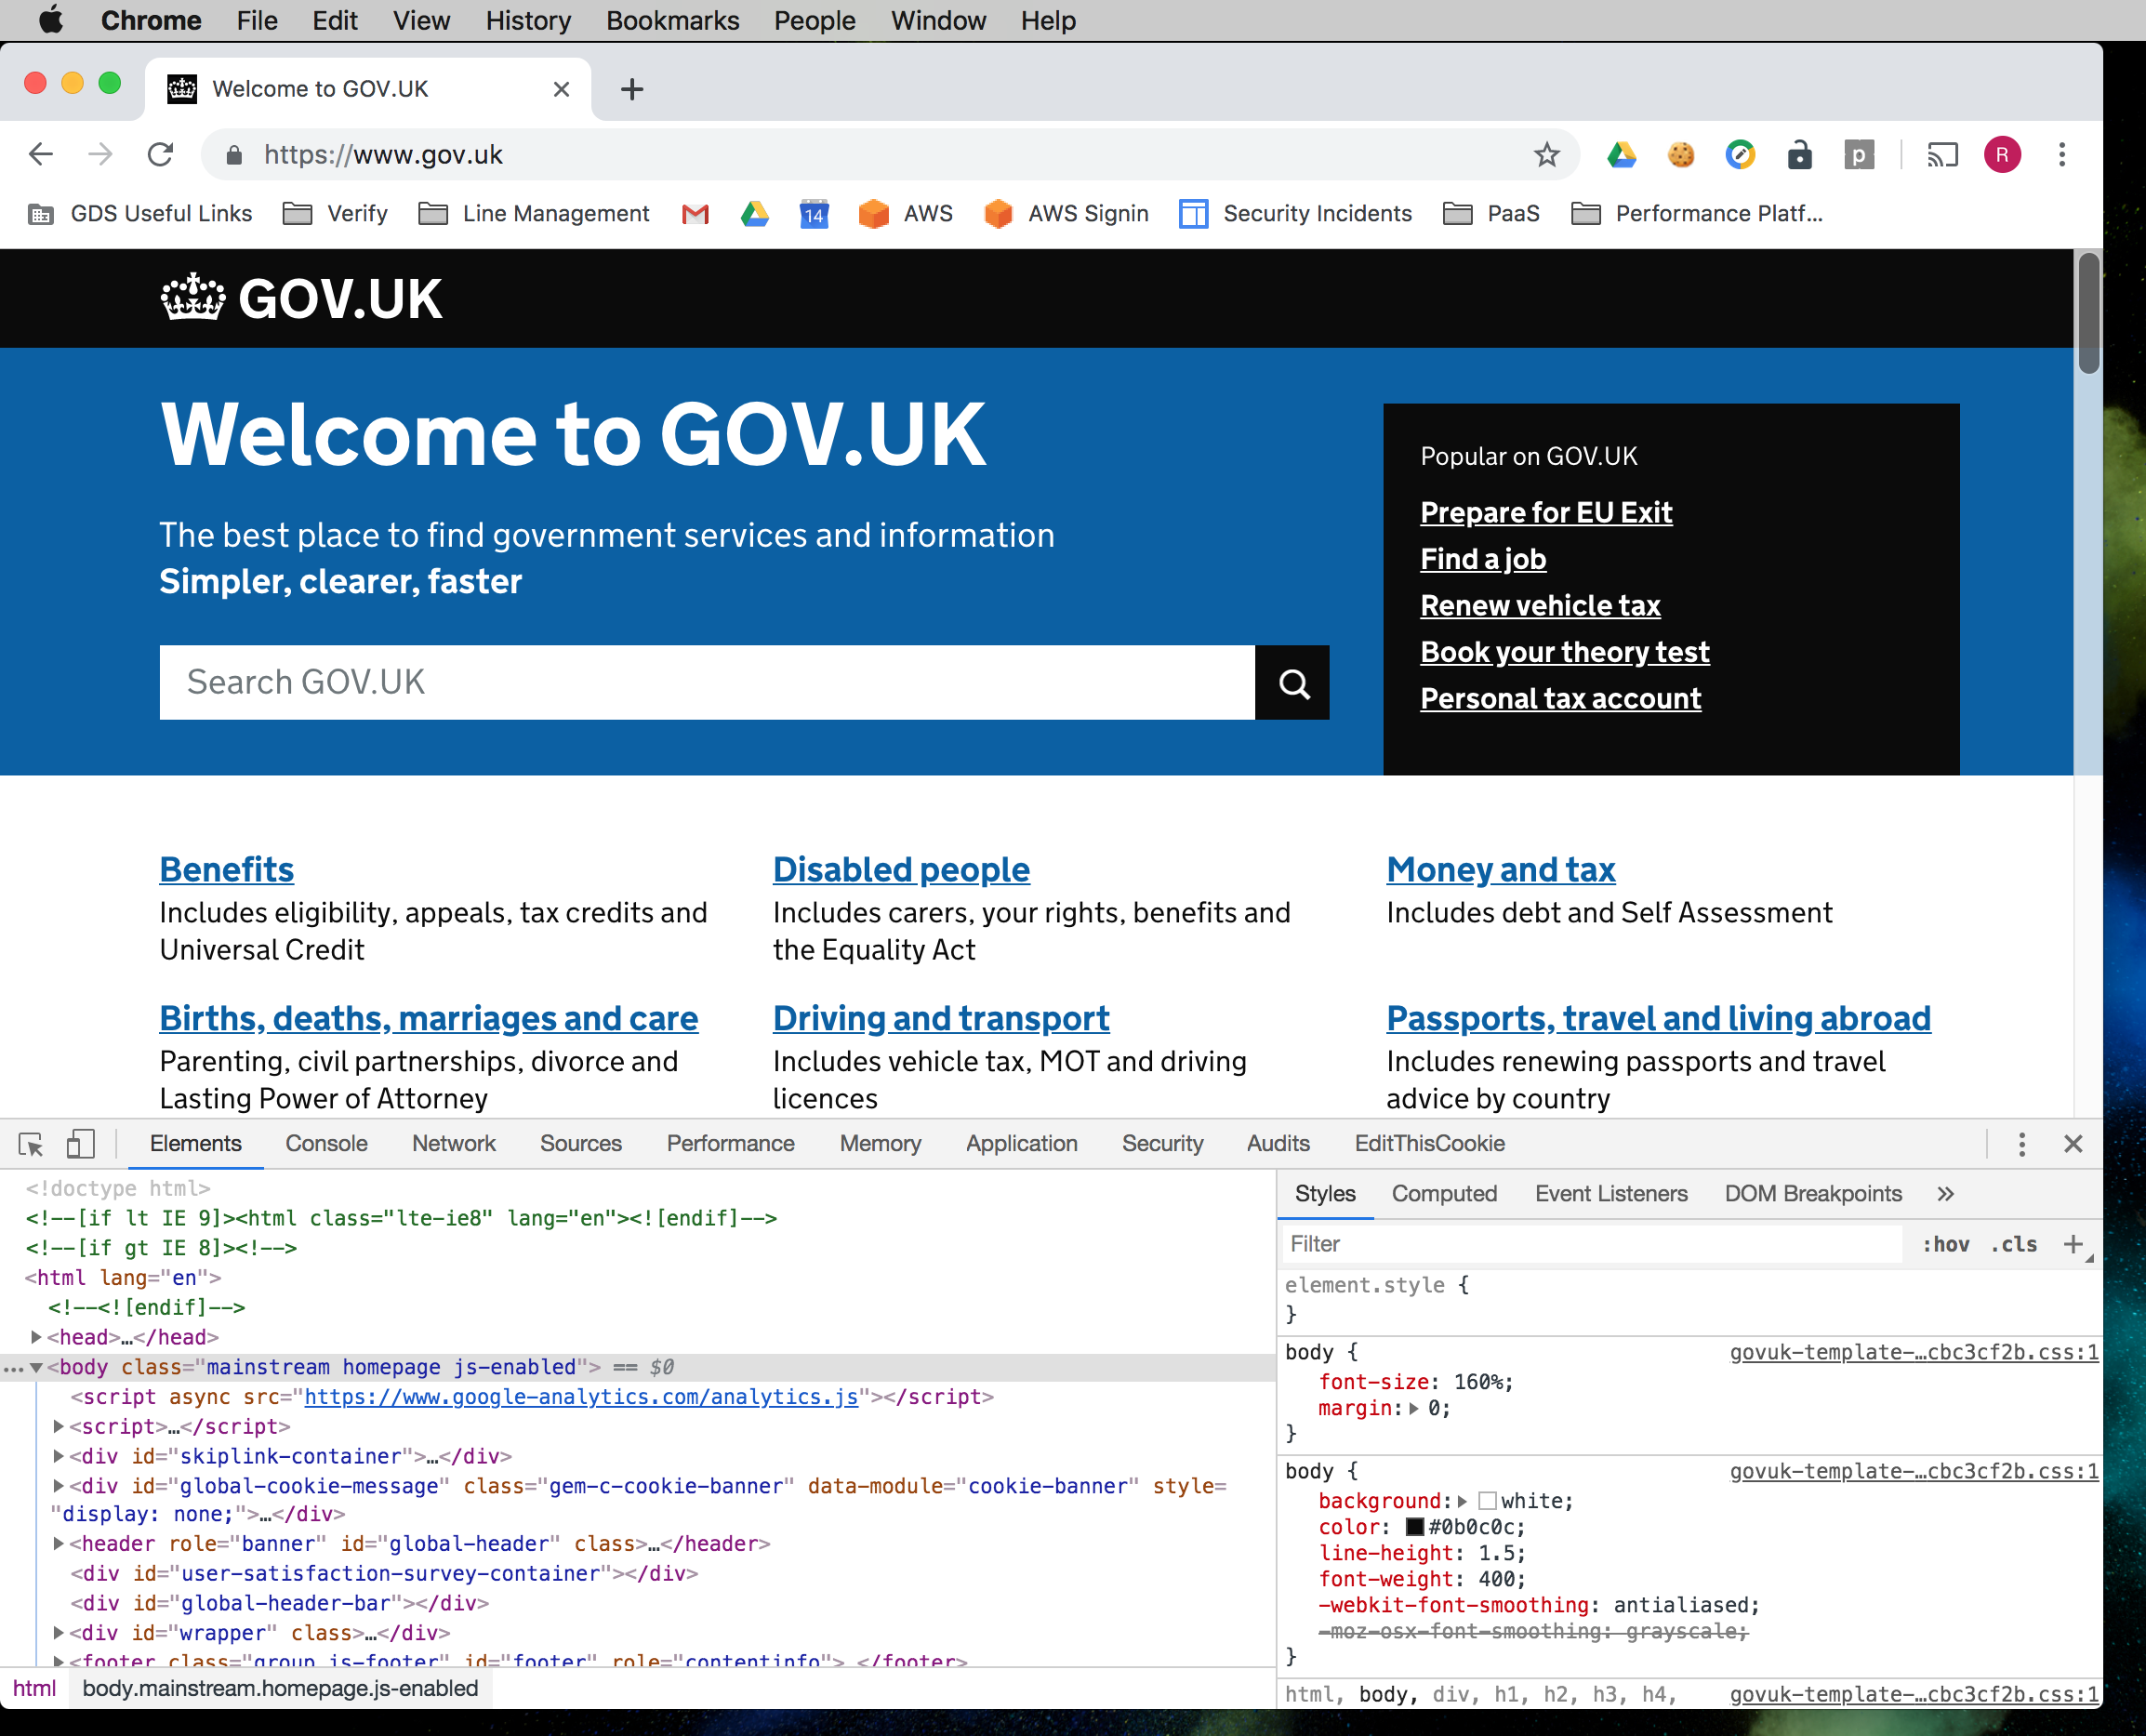
Modern browsers come with built in tools that let you see what’s happening
under the hood. In Google Chrome on a Mac you can bring these up for any
webpage by pressing Command + Option + I (⌘ + ⌥ + I).
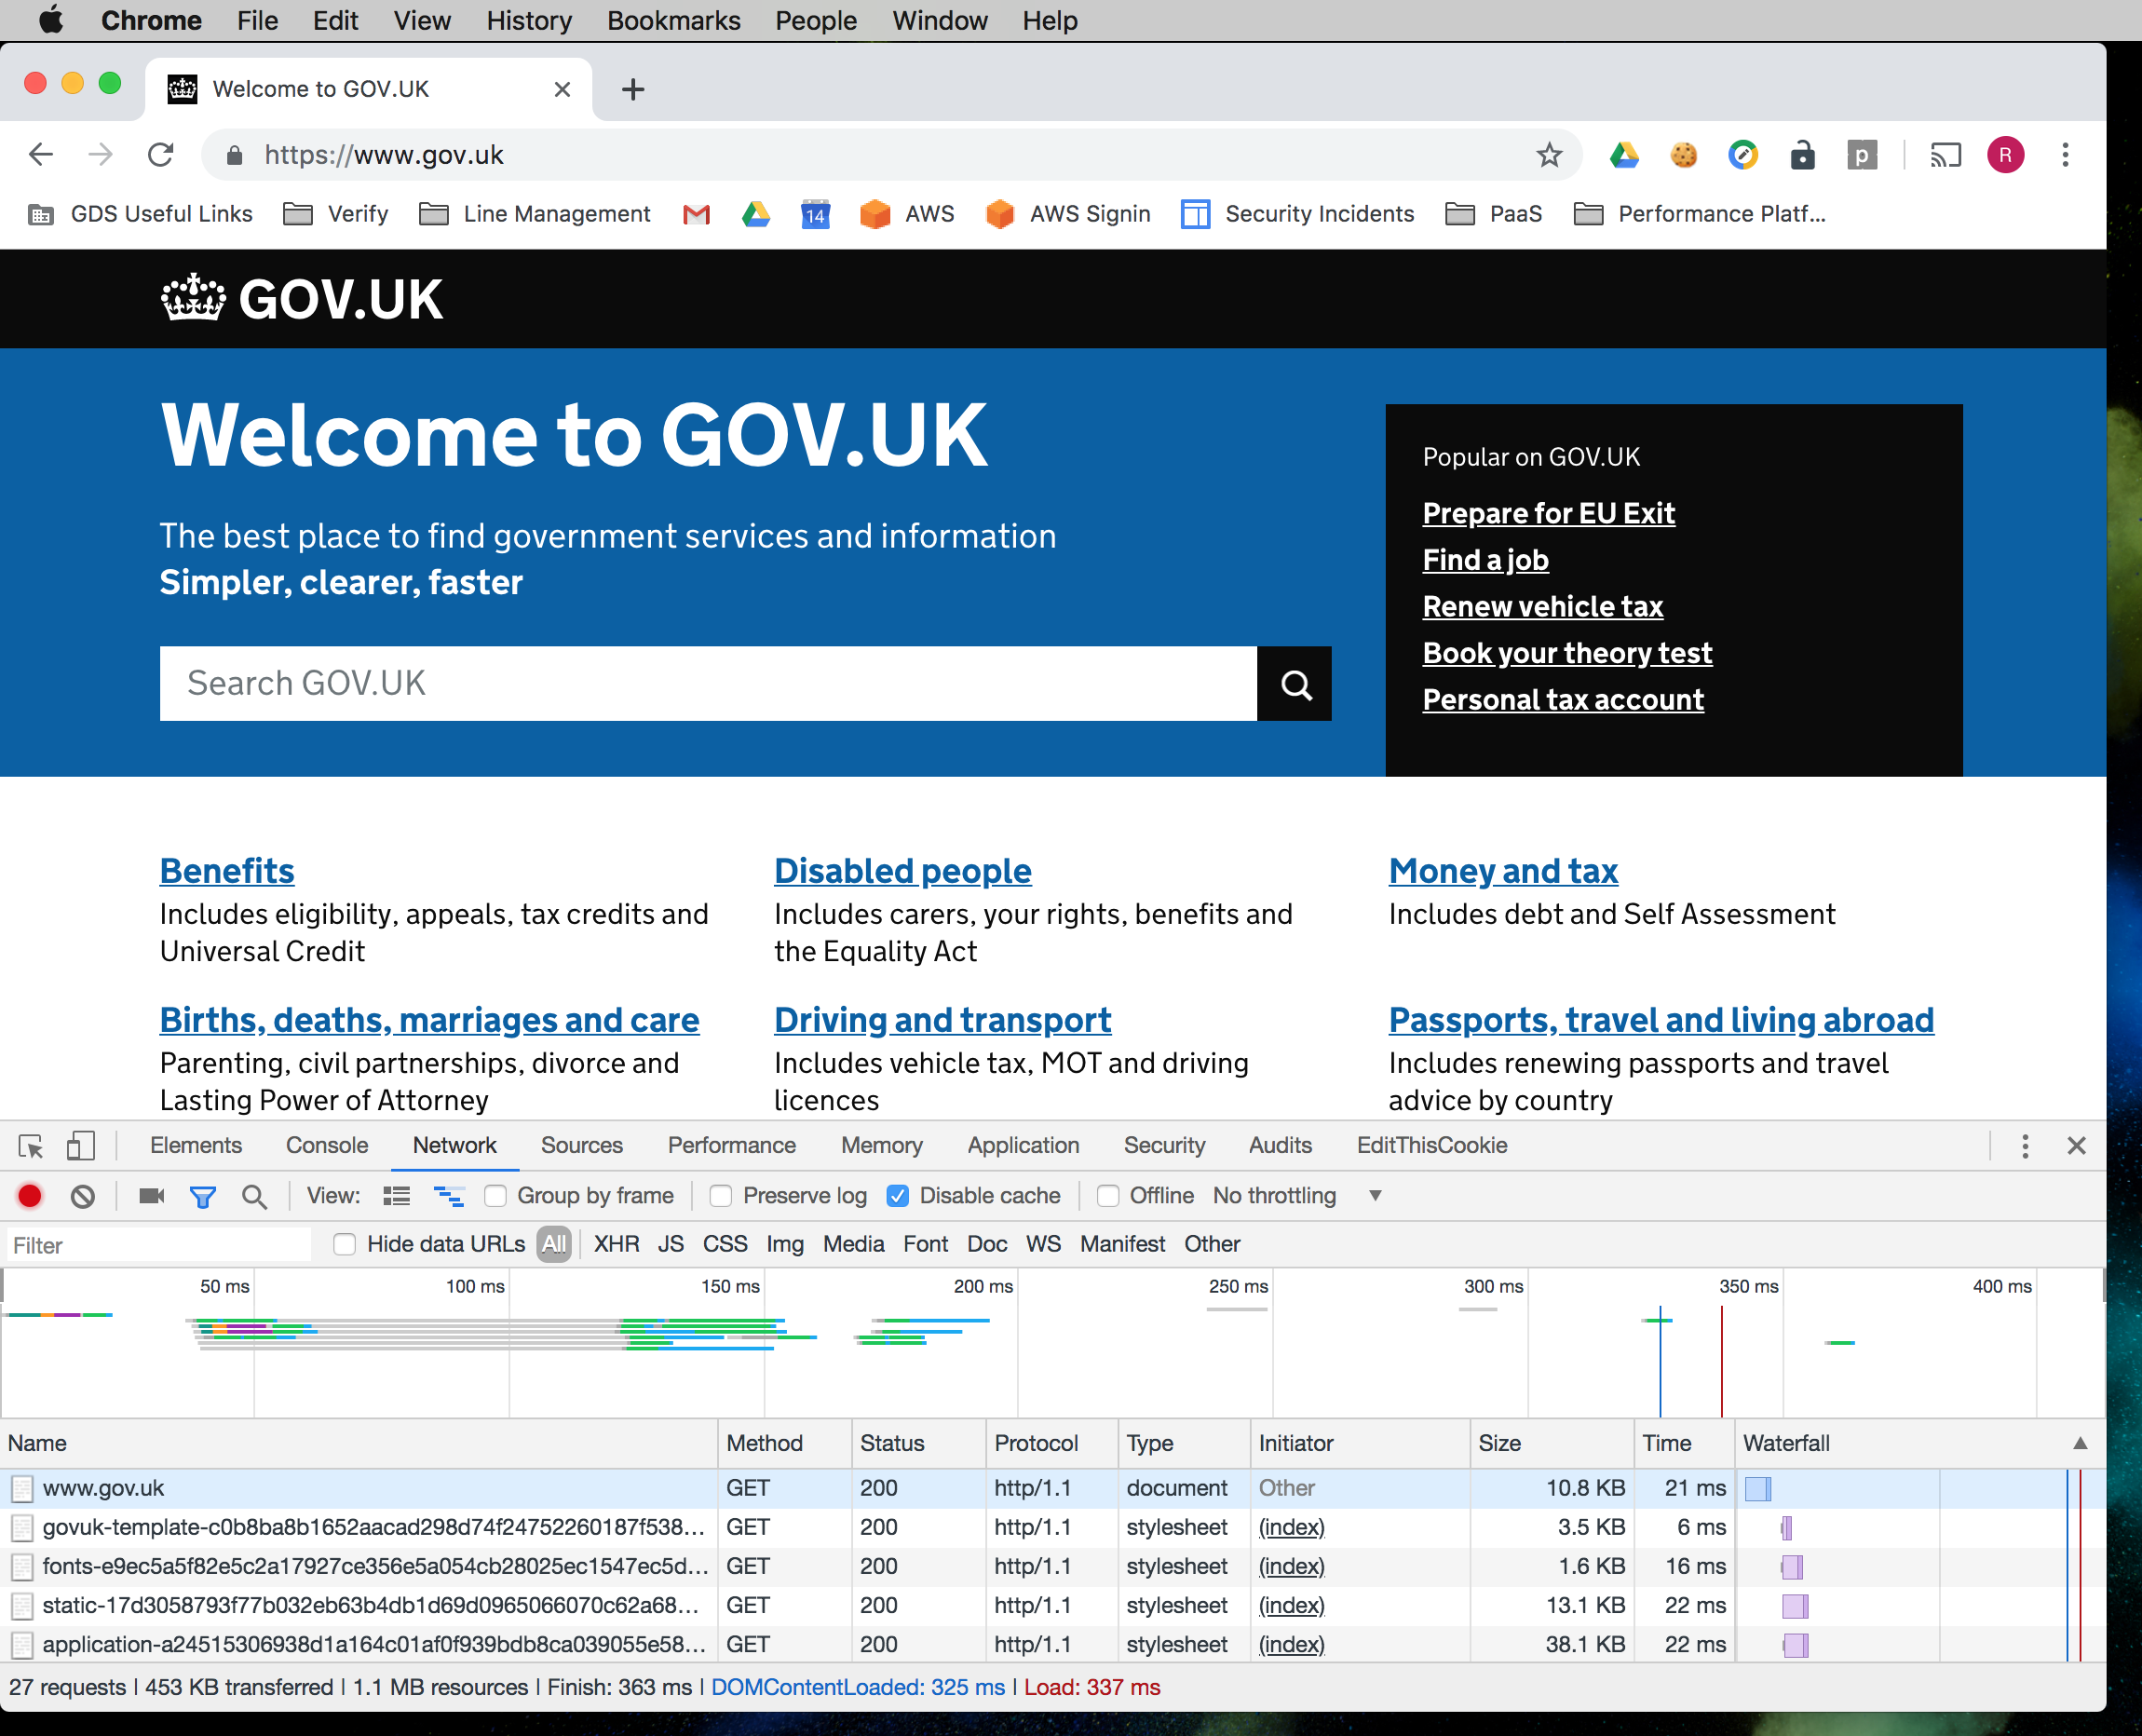
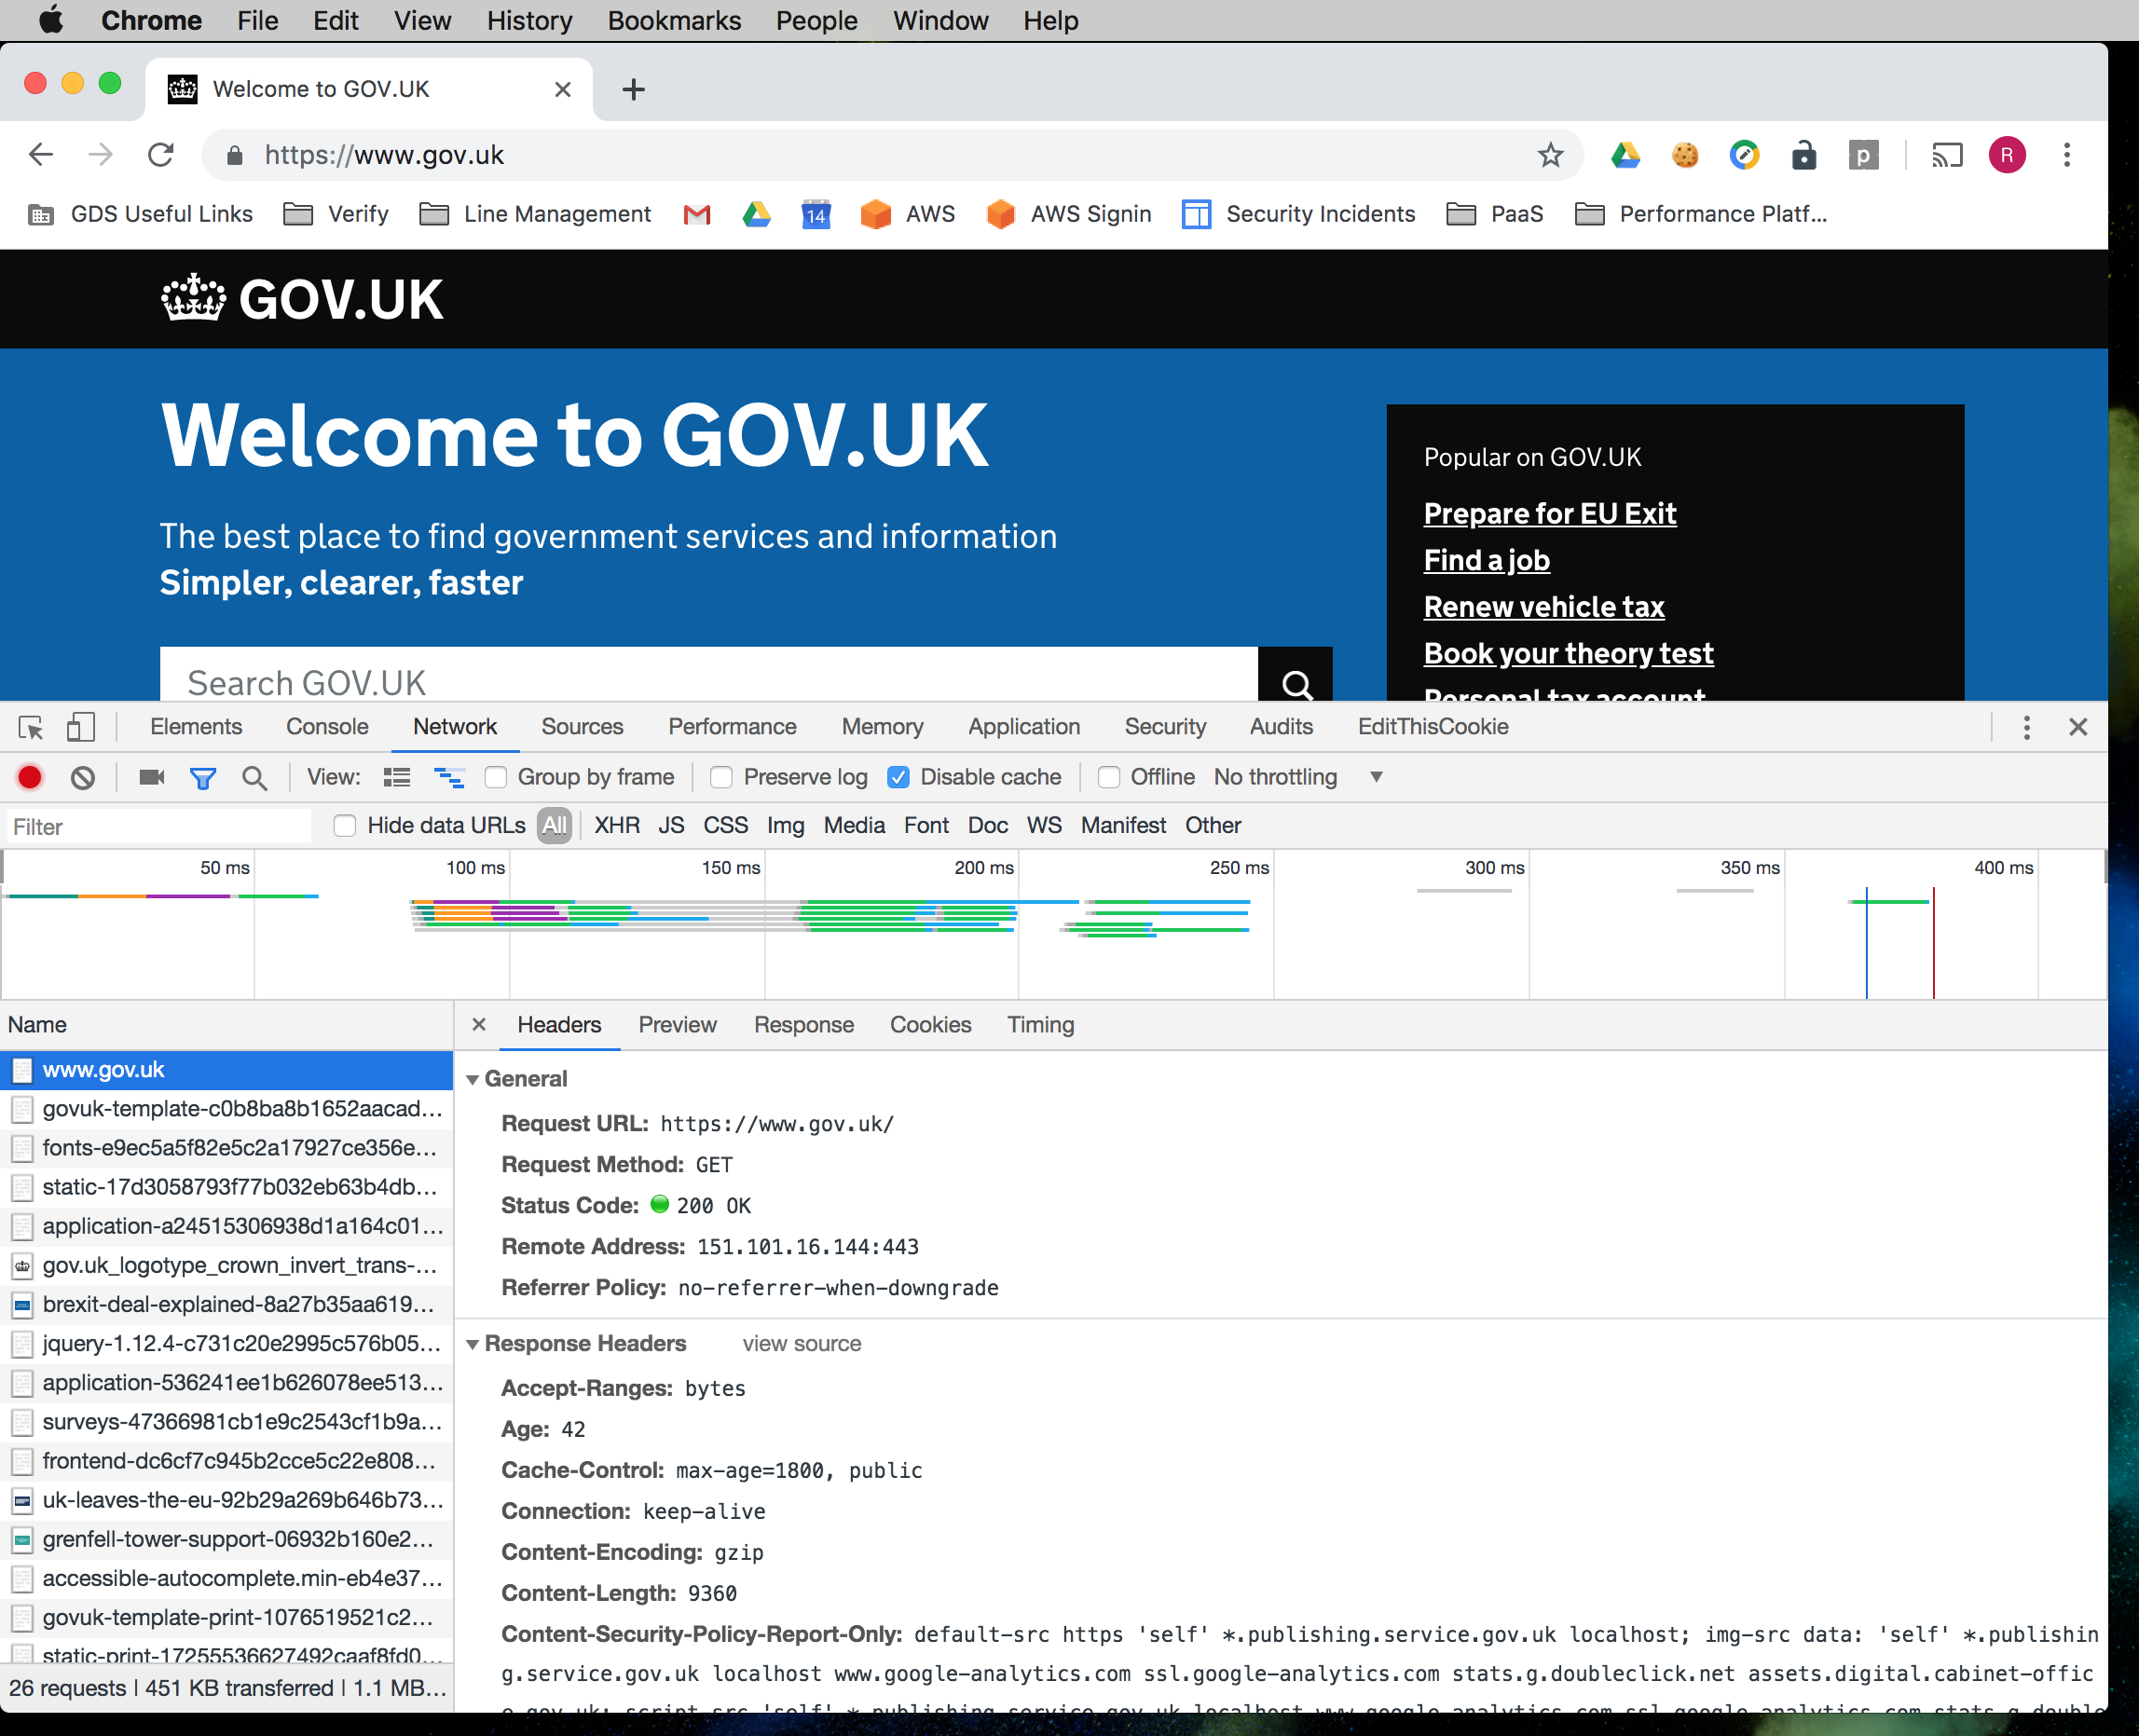
The Network tab shows you the requests and responses your browser is sending and receiving.
Task 3: Use the developer tools to look at an HTTP request
Go to any website you like and use the developer tools to look at the first HTTP request it makes.
Answer (screenshots)
 Building web servers with Ruby
What is a web server?
A web server is a computer program that can understand HTTP requests and respond to them with HTTP responses.
In lesson 1 we built a website which sent the same HTML back for every request. By getting Ruby involved in handling the request we can make our website dynamic (so the response is not always the same). We can also perform side effects in response to certain requests (like sending emails, or printing out physical barking permits).
Ruby is a great language to get started with, because it has everything you need to build simple web servers built right in to the language.
First of all, let’s create some files for us to serve.
Task 4: Create files and directories
- Create a folder called
lesson-4-ruby-on-the-webnext to your other lesson folders. - Inside this folder, create another folder called
public, and copy the images folder from lesson 1 inside.
You should end up with a directory structure like:
lesson-4-ruby-on-the-web
└── public
    └── images
        ├── puppy-in-a-hat.jpg
        └── shiba-inu.jpg
Hello WEBrick!
Earlier we require‘d "date" so we could do some things with dates which
are not in the core ruby language. Similarly, we can require a thing called
"webrick" which allows us to build HTTP servers.
We can use WEBrick to create a new server by calling the
WEBrick::HTTPServer.new method like this:
require("webrick")
server = WEBrick::HTTPServer.new(Port: 8080, DocumentRoot: './public')
This might look a bit confusing because it uses some bits of Ruby we haven’t introduced yet (what are all these colons doing all of a sudden?). Do not worry about it - at some point you’ll learn about modules, classes, and named arguments and it will all make sense.
The server lets us respond to HTTP requests in any way we like. We can use
the .mount_proc method to attach a block of Ruby code to a particular request like this:
server.mount_proc("/home") do |request, response|
  puts("Hello server!")
  response.body = "Hello browser!"
end
.mount_proc is a bit like .times from lesson 3:
10.times do |i|
  puts("#{10 - i} green bottles, hanging on the wall,")
  # ...
end
only instead of running the block 10 times straight away, WEBrick will run
the block every time a request is made to the /home path.
The final thing we need to do to make the server work is start it, which we
do by calling the .start method after we’ve made all our calls to
.mount_proc:
server.start
Task 5: Create a “hello world” server
- Create a file inside the
lesson-4-ruby-on-the-webfolder calledhello-world-server.rb - Copy / paste (or type) the following ruby into
hello-world-server.rb
require("webrick")
server = WEBrick::HTTPServer.new(Port: 8080, DocumentRoot: './public')

server.mount_proc("/home") do |request, response|
  puts("Hello server!")
  response.body = "Hello browser!"
end

server.start
- On the command line, change directory into
lesson-4-ruby-on-the-webusingcd - Run
hello-world-server.rbfrom the command line withruby hello-world-server.rb - Visit http://localhost:8080/home in your browser
- Reload the page a few times to see what happens
Answer
You should see a web page that says “Hello browser!” and you should see some lines on the command line like this: “` [2019-05-29 21:38:46] INFO WEBrick 1.3.1 [2019-05-29 21:38:46] INFO ruby 2.3.7 (2018-03-28) [universal.x86_64-darwin17] [2019-05-29 21:38:46] INFO WEBrick::HTTPServer#start: pid=86541 port=8080 Hello server! ::1 - - [29/May/2019:21:38:58 BST] "GET / HTTP/1.1” 200 14 - -> / Hello server! ::1 - - [29/May/2019:21:38:59 BST] “GET /favicon.ico HTTP/1.1” 200 14 http://localhost:8080/ -> /favicon.ico Hello server! ::1 - - [29/May/2019:21:39:03 BST] “GET / HTTP/1.1” 200 14 - -> / Hello server! ::1 - - [29/May/2019:21:39:03 BST] “GET /favicon.ico HTTP/1.1” 200 14 http://localhost:8080/ -> /favicon.ico “` Note that `puts("Hello server!”)` still prints to the command line, and that the `response.body` is what we see in the browser.Serving HTML
We usually want to respond with some HTML, not just “Hello browser!”.
To make the browser treat our response as HTML we need to set an HTTP header
called Content-Type like this:
server.mount_proc("/home") do |request, response|
  response.content_type = "text/html; charset=utf-8"
  response.body = "<h1>Hello browser!</h1>"
end
It can get difficult to maintain if we put all our HTML in ruby strings like
we did in the example above. It would be much nicer if we could have our HTML
in html files and our Ruby in ruby files. Fortunately, we can achieve this
with File.read:
server.mount_proc("/home") do |request, response|
  response.content_type = "text/html; charset=utf-8"
  response.body = File.read("index.html")
end
(This assumes there’s a file called index.html in your command line’s working directory)
Task 6: Serve an HTML file with WEBRick
- Copy
lesson-1-html-and-css/index.htmlintolesson-4-ruby-on-the-web - Create a copy of
hello-world-server.rbcalledbarking-permit-server.rb - Using the example above, make the server respond with the text from
index.html - Run the server with
ruby barking-permit-server.rband visit http://localhost:8080/home to check it works - When you’re done, stop the server with
CTRL + C
Answer
“`ruby require("webrick”) server = WEBrick::HTTPServer.new(Port: 8080, DocumentRoot: ’./public’) server.mount_proc(“/home”) do |request, response| response.body = File.read(“index.html”) end server.start “`Responding to requests
Our "Apply for a Barking Permit” page contains a form.
Forms let the user provide the server with some input. When you submit the
form you should see the URL update to have ?dog-name=Fido&dog-age=3 at the
end.
What’s happening is the browser is making a second HTTP request to the server, but this time it’s passing the user input in the URL (the bits after the question mark are called query parameters).
We can access query parameters inside our WEBrick block using
request.query["key"] (note: square brackets, not round brackets)
server.mount_proc("/home") do |request, response|

  dog_name = request.query["dog-name"]
  dog_age = request.query["dog-age"]

  puts("The dog #{dog_name} is #{dog_age} years old")

  response.body = File.read("index.html")
end
Task 7: different responses depending on the query
- Update
barking-permit-server.rbto read user input withrequest.query[] - Using
if request.query["dog-name"]set the value ofresponse.bodyto be “The dog Fido is 3 years old” if the user provided a name, orFile.read(...)if not - Run the server with
ruby barking-permit-server.rb, visit http://localhost:8080/home and submit the form - When you’re done, stop the server with
CTRL + C
Answer
“`ruby require("webrick”) server = WEBrick::HTTPServer.new(Port: 8080, DocumentRoot: ‘./public’) server.mount_proc(“/home”) do |request, response| dog_name = request.query[“dog-name”] dog_age = request.query[“dog-age”] if dog_name response.body = “The dog #{dog_name} is #{dog_age} years old” else response.body = File.read(“index.html”) end end server.start “`Templating HTML
We’ve learned how to get the user’s form input on the server, and change our response depending on the input.
Our response to the user should be HTML as well though. If we’re reading the HTML response from a file how do we change the contents based on the user’s input?
Templating lets us take a file and substitute placeholders with values of our
choice. There are lots of fancy templating languages out there, but for us
Ruby’s .sub method will be good enough.
Imagine we had some HTML in a file called fruits.html:
<h1>Favourite Fruit</h1>

<p>My favourite fruit is FAVOURITE_FRUIT_NAME. I like it the best because it is FAVOURITE_FRUIT_REASON.</p>
We could load this file up, and then substitute the placeholders like this:
File.read("fruits.html")
  .sub("FAVOURITE_FRUIT_NAME", "Banana")
  .sub("FAVOURITE_FRUIT_REASON", "easy to peel")
Which would return:
<h1>Favourite Fruit</h1>

<p>My favourite fruit is Banana. I like it the best because it is easy to peel.</p>
Task 8: Template barking permit
Create a file called barking-permit-template.html in lesson-4-ruby-on-the-web.
Add the following HTML to the file (it’s fine to copy-paste this):
HTML for `barking-permit-template.html`
”`htmlApply for a Barking Permit
Application complete
Update barking-permit-server.rb so that when request.query["dog-name"] is
set, response.body is set to File.read("barking-permit-template.html").
Use .sub to replace DOG_NAME with request.query["dog-name"] and a
second .sub to replace DOG_AGE_HUMAN_YEARS with request.query["dog-age"].
Run the server with ruby barking-permit-server.rb, visit http://localhost:8080/home and submit the form.
When you’re done, stop the server with CTRL + C.
Answer
”`ruby require(“webrick”) server = WEBrick::HTTPServer.new(Port: 8080, DocumentRoot: ‘./public’) server.mount_proc(“/home”) do |request, response| dog_name = request.query[“dog-name”] dog_age = request.query[“dog-age”] if dog_name response.body = File.read(“barking-permit-template.html”) .sub(“DOG_NAME”, dog_name) .sub(“DOG_AGE_HUMAN_YEARS”, dog_age) else response.body = File.read(“index.html”) end end server.start “`Finishing off the Barking Permit
Following Task 8, our Barking Permit has:
- Name
- Age (human years)
We could use Ruby to add some more rows to the permit and make it a bit more useful. For example: age in Dog Years (from lesson 3) and how long the permit is valid for.
Task 9: Add rows to the Barking Permit
- Add rows (
<tr>...</tr>) with template placeholders tobarking-permit-template.htmlfor:- Age (dog years) (
DOG_AGE_DOG_YEARS) - Issued on (
PERMIT_ISSUED_ON) - Valid until (
PERMIT_VALID_UNTIL)
- Age (dog years) (
- Calculate values for the placeholders using Ruby
- Age (dog years) should be the Age in human years multiplied by 7 (as per lesson 3)
- Issued on should be today’s date, formatted as
Day/Month/Year - Valid until should be today’s date + 1,000 days (arbitrarily), formatted as
Day/Month/Year
- Use three more
.subs to replace the placeholders - Run the server with
ruby barking-permit-server.rb, visit http://localhost:8080/home and submit the form. - When you’re done, stop the server with
CTRL + C.
Answer
”`ruby require(“webrick”) require(“date”) def convert_to_dog_years(age_human_years) return age_human_years * 7 end server = WEBrick::HTTPServer.new(Port: 8080, DocumentRoot: ‘./public’) server.mount_proc(“/home”) do |request, response| dog_name = request.query[“dog-name”] dog_age = request.query[“dog-age”] if dog_name response.body = File.read(“barking-permit-template.html”) .sub(“DOG_NAME”, dog_name) .sub(“DOG_AGE_HUMAN_YEARS”, dog_age) .sub(“DOG_AGE_DOG_YEARS”, convert_to_dog_years(dog_age.to_i).to_s) .sub(“PERMIT_ISSUED_ON”, Date.today.strftime(“%d/%m/%Y”)) .sub(“PERMIT_VALID_UNTIL”, (Date.today + 1000).strftime(“%d/%m/%Y”)) else response.body = File.read(“index.html”) end end server.start “`Warning: security!
We’ve deliberately cut some corners by using .sub for our templating
which would cause security problems in a production application.
In particular, mixing user input and HTML can leave us vulnerable to a thing called Cross-site scripting.
You do not need to worry about this for the purposes of this lesson, but if you’re building a production website make sure to talk to a developer to check you’re following good security practices.
Frameworks like Ruby on Rails and Sinatra help you avoid making security mistakes like this.
Congratulations!
If you’ve made it this far, give yourself a massive pat on the back! These three lessons have been a whirlwind introduction to the world of programming on the web. Do not worry if it things still seem confusing - programming is a skill that takes time to learn.
Programming is amazingly useful now that computers are such a big part of our lives, but it can also be great fun. Hopefully this is just the start of your learning journey!

